1. What’s so hard about adding new functions to a system once it’s up and running?
Adding new functionality to a system that’s already in operation usually requires a firmware update.
This is a particularly burdensome task when that system isn’t IoT-enabled; someone will need to visit each individual installment's location to perform the updates.
Furthermore, hardware updates such as connecting devices or sensors are similarly difficult when a system is in operation.
This article will explain how all of these challenges can be overcome by remotely adding functions with JavaScript.
2. No need to anticipate future functionality when developing firmware!
To give a brief overview, NEQTO Engine refers to the firmware that gets embedded on the edge side (MCUs) of IoT solutions.
This firmware is ultimately what controls devices and physical hardware. Within the NEQTO Engine is a JavaScript Engine, which enables users to develop their applications in JavaScript.
To manage and remotely control NEQTO Engine-enabled devices and hardware, NEQTO includes a cloud service called NEQTO Console.
On the NEQTO Console, users can take advantage of the JavaScript editor to write code and develop in JavaScript through their browser.
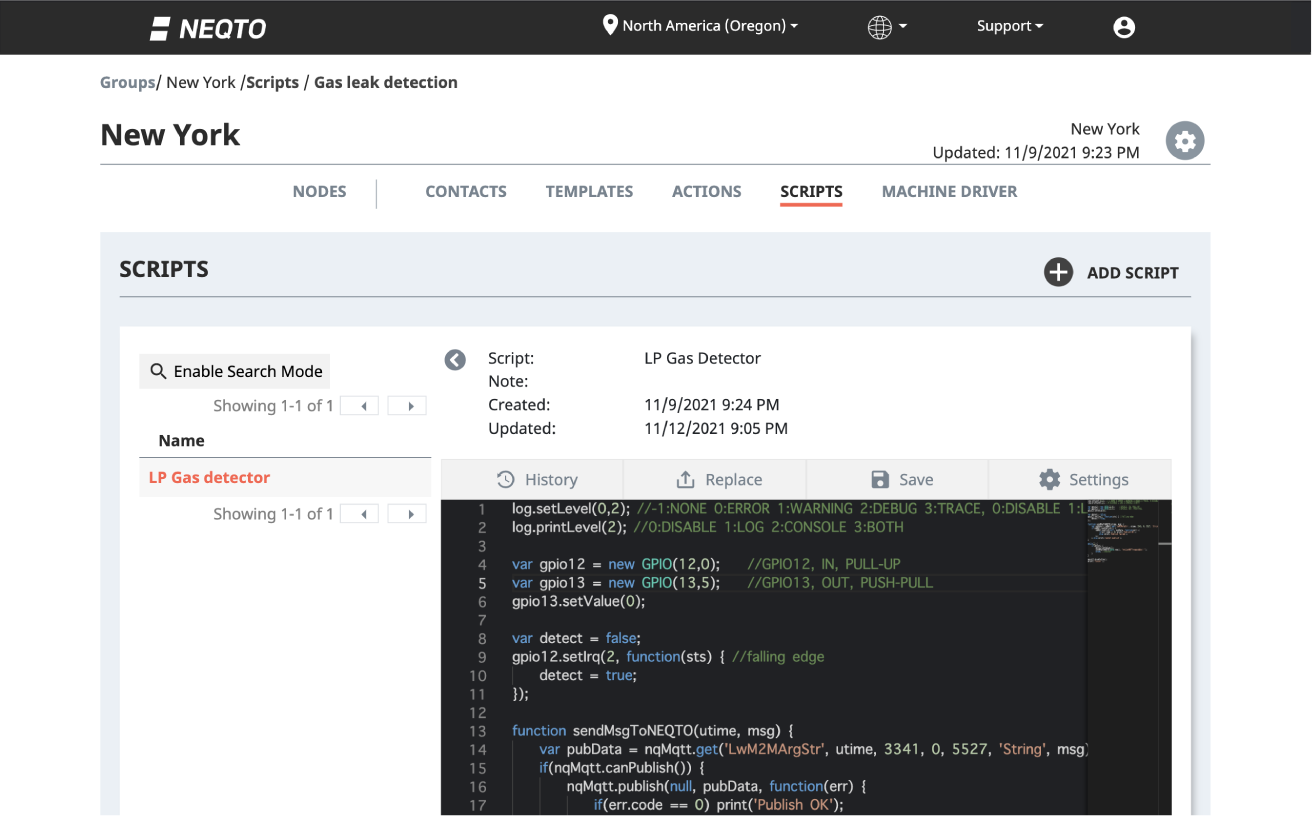
Figure 1: JavaScript editor on the NEQTO Console
Once the new function’s JavaScript code has been added using the NEQTO Console, simply click "Reload Script" and the changes will be applied immediately. You can choose to update the script for each device individually or for all devices in a batch.

Figure 2: ‘Reload Script’ function on NEQTO Console
3. Benefits of using JavaScript to add new functions
With the JavaScript editor on NEQTO Console, you can develop in JavaScript without having to download or install a development environment. There’s also no need to compile code, so adding new functions to your system is as easy as replacing and reloading the script on the devices of your choice.
4. Demo: How to add functions using JavaScript
To demonstrate, we’ll use an example system that detects leaks of liquefied petroleum gas (LP gas) and sends email alerts to an administrator.
We’ll assume that ‘device A’ has a terminal block with IO connection, as shown in the figures below. For our IoT device, we’ll use the STM32 Discovery Kit (B-L4S5I-IOT01A) from STMicroelectronics and connect it to the LP gas detector.
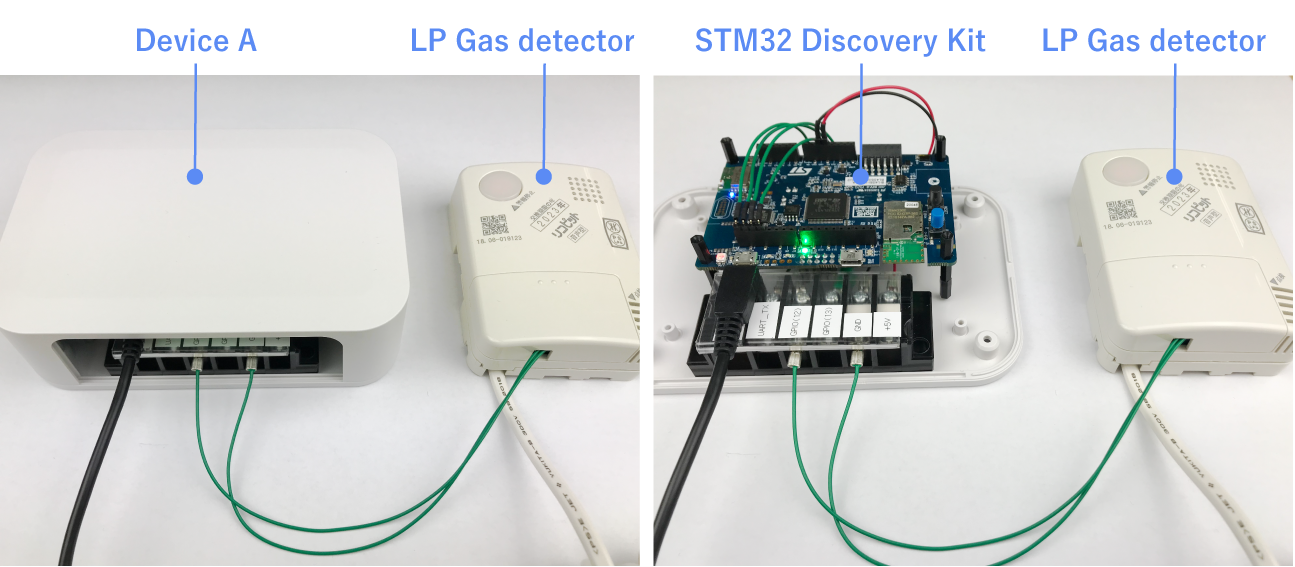
Figure 3: LP Gas Detector & Device A connected
We have made the connections for power, UART, and GPIO on device A’s terminal block.
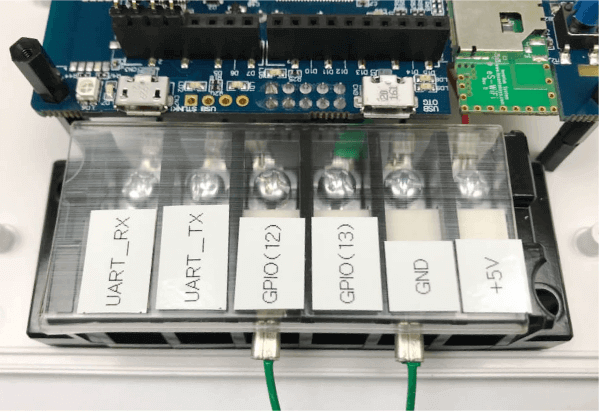
Figure 4: Wiring to Device A’s terminal block
The relay output of the LP gas detector is connected to GPIO (12) and GND of Device A. This relay output is the A contact, and is set to open by default. Once a gas leak is detected, the contact closes.
On the NEQTO Console, you can manage users by region with “Groups”.
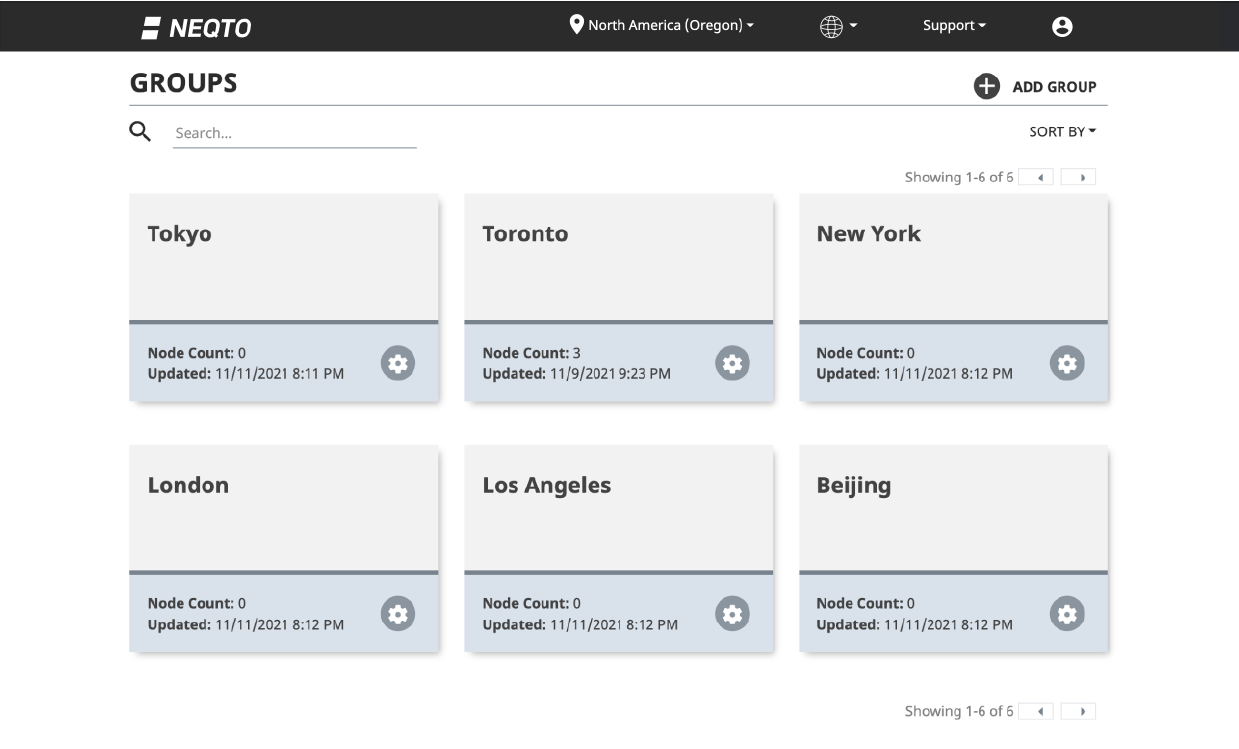
Figure 5: Groups on the NEQTO Console
You can also manage users in a Group by associating them with a "Node." The figure below shows an example where users (Client A, B, and C) are tied to Nodes in a Group called “New York.”
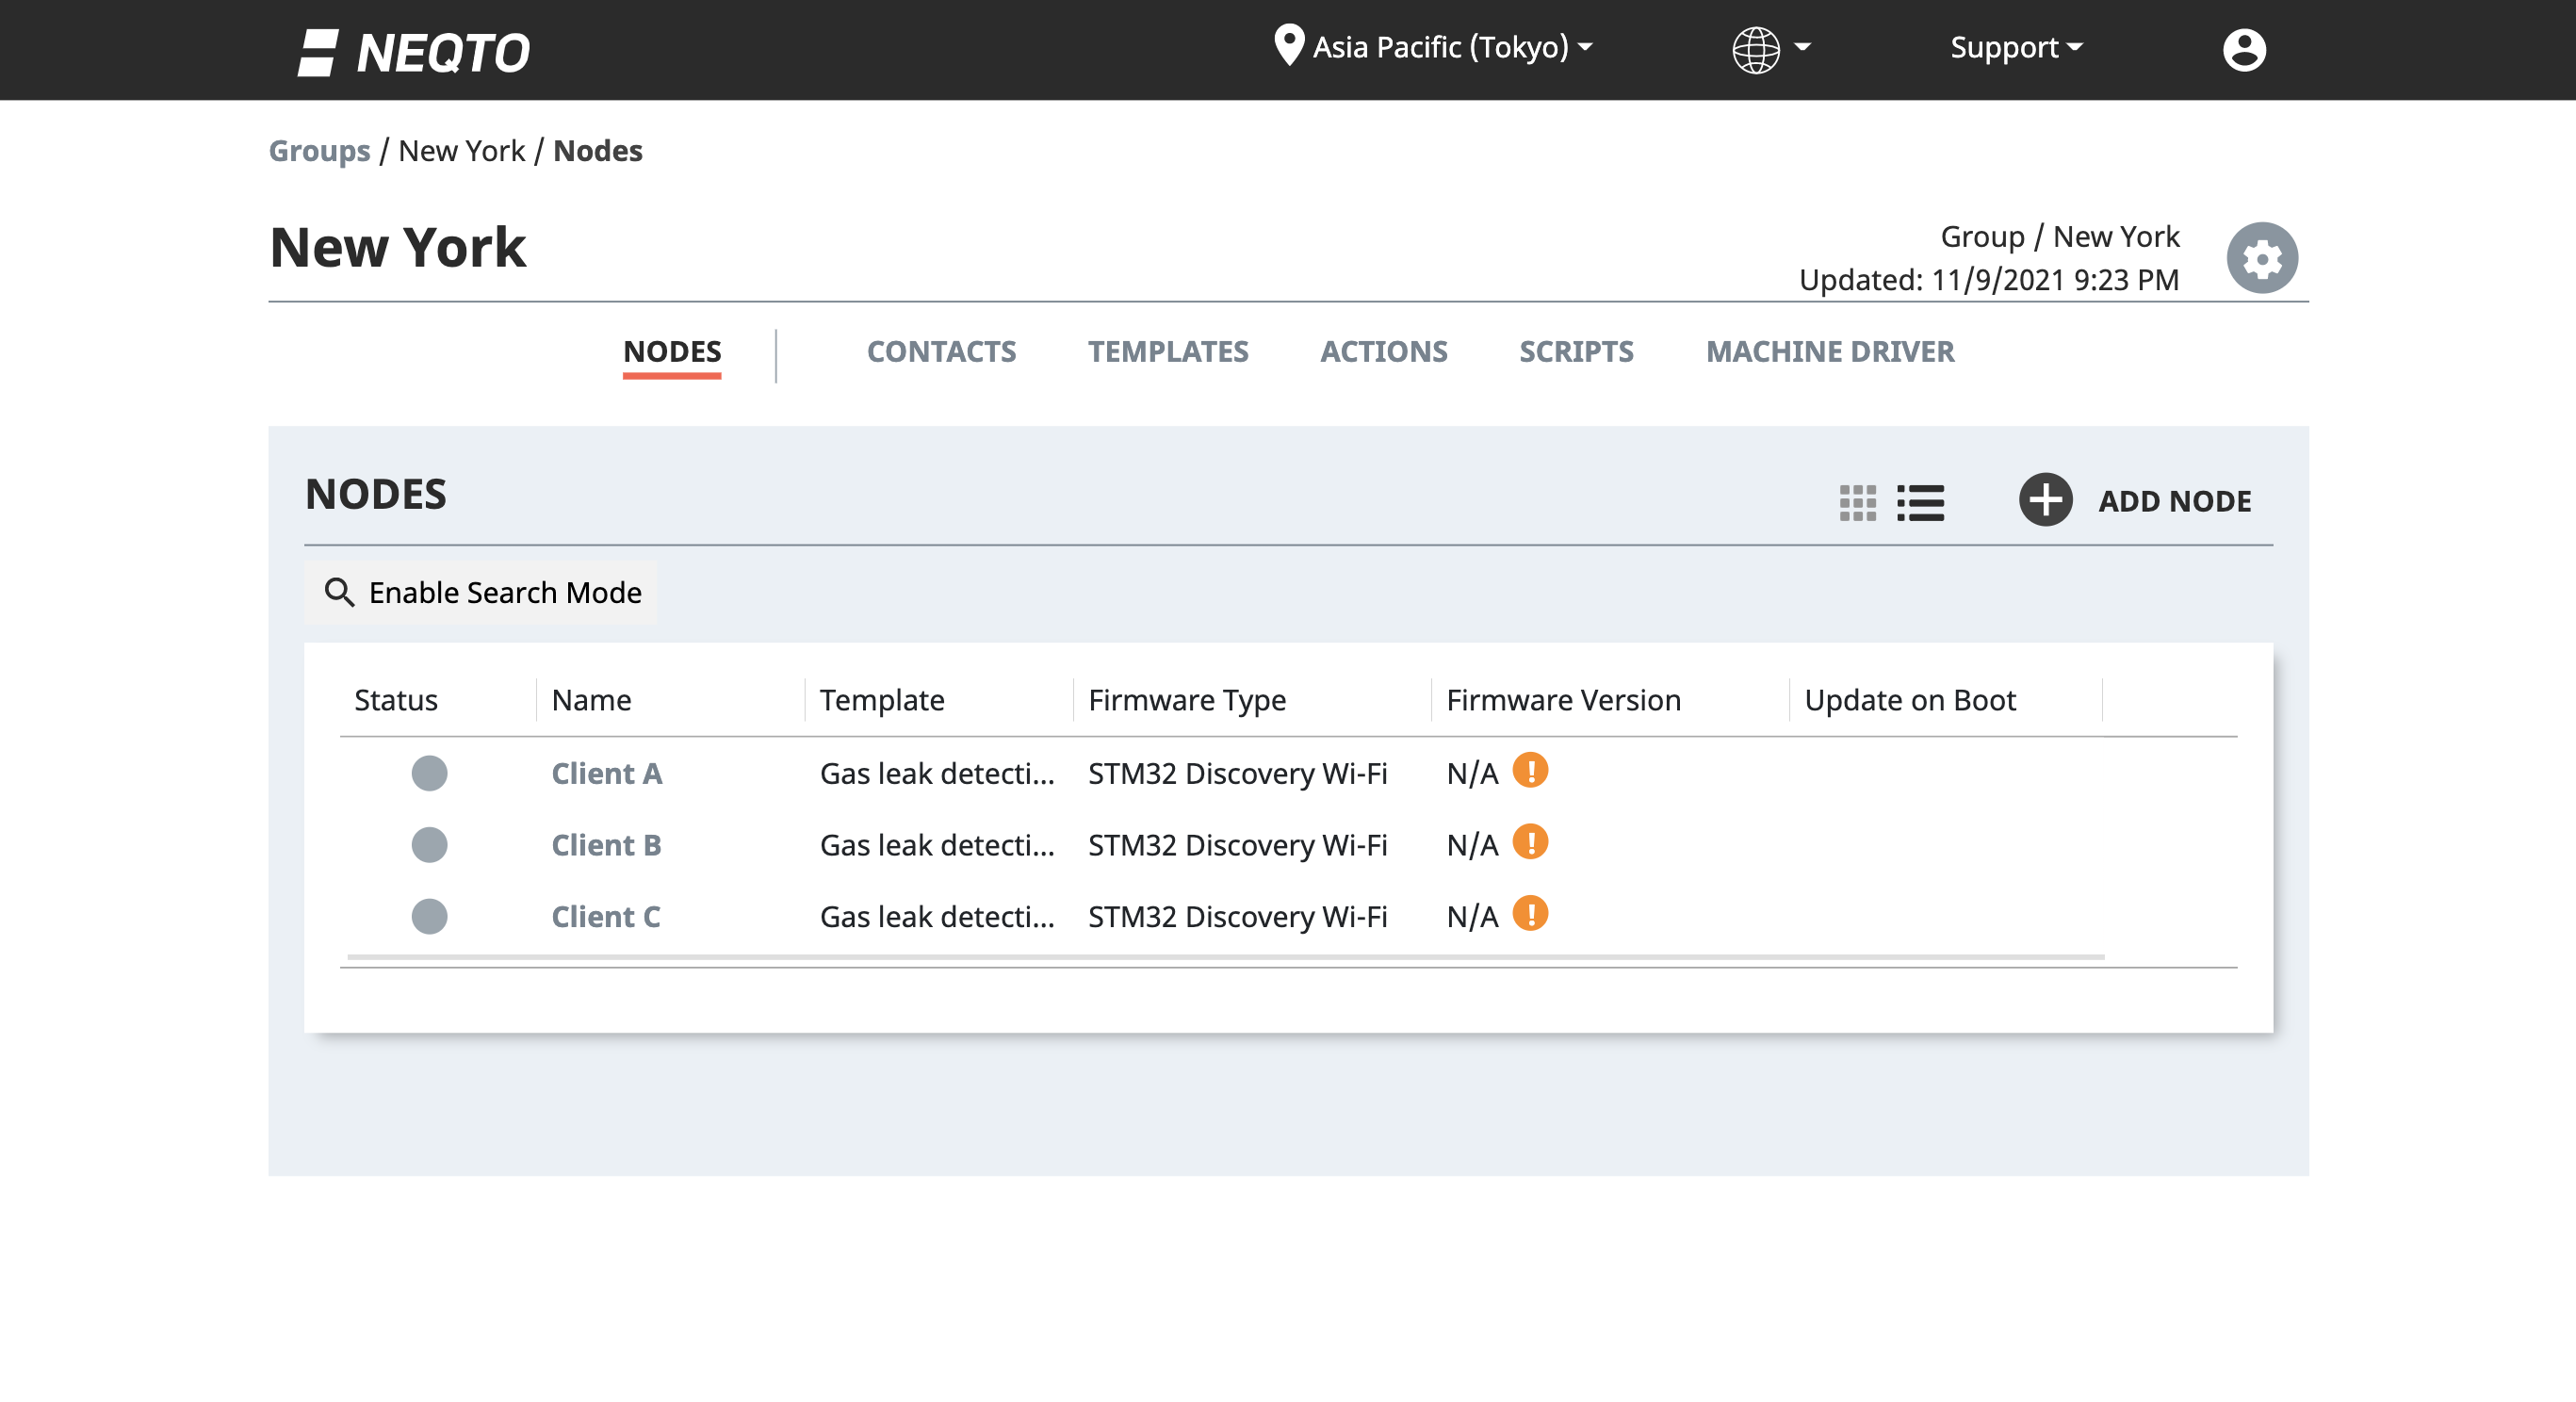
Figure 6: Nodes on the NEQTO Console
Using the Action function on the NEQTO Console, we can configure the system to send an email alert when a gas leak is detected by the gas detector.
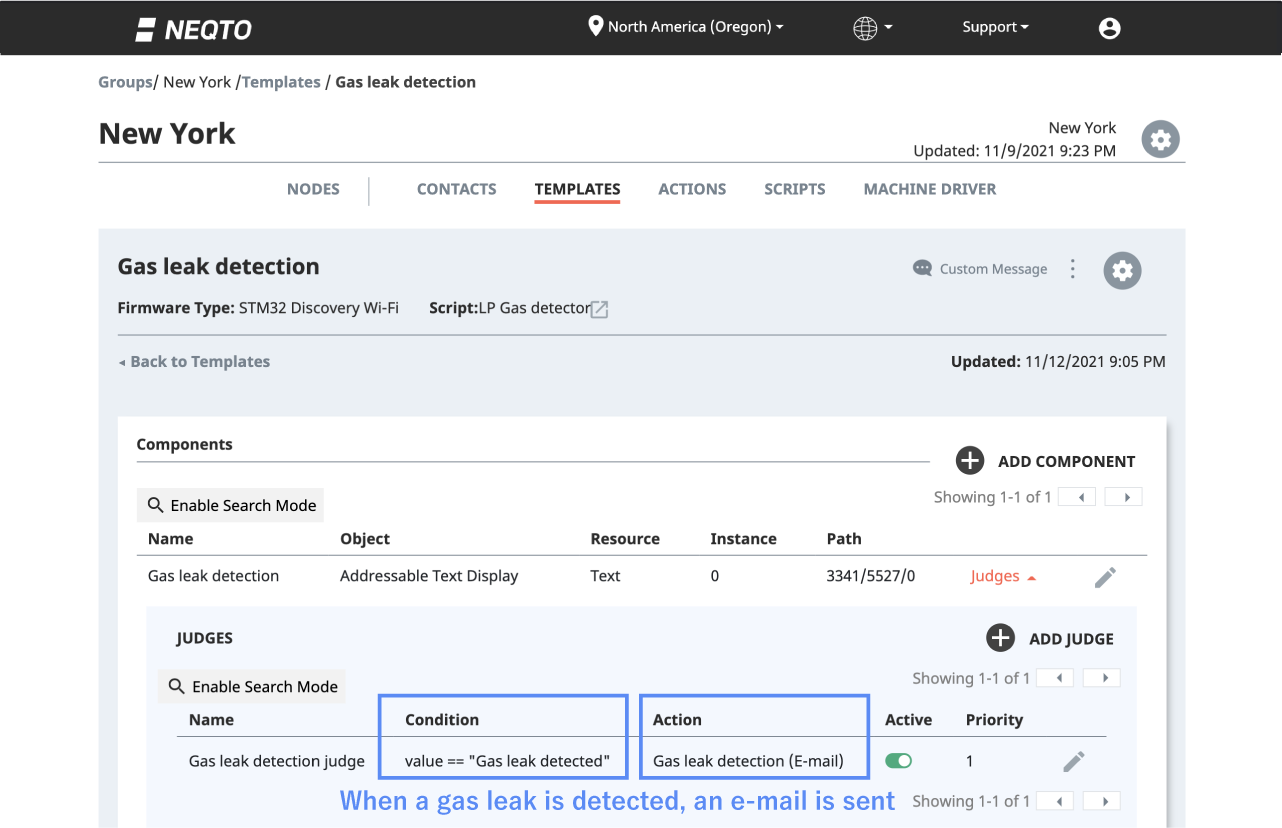
Figure 7: Action settings on the NEQTO Console
We can then confirm using a test gas that the following email is sent when the LP gas alarm detects a gas leak.
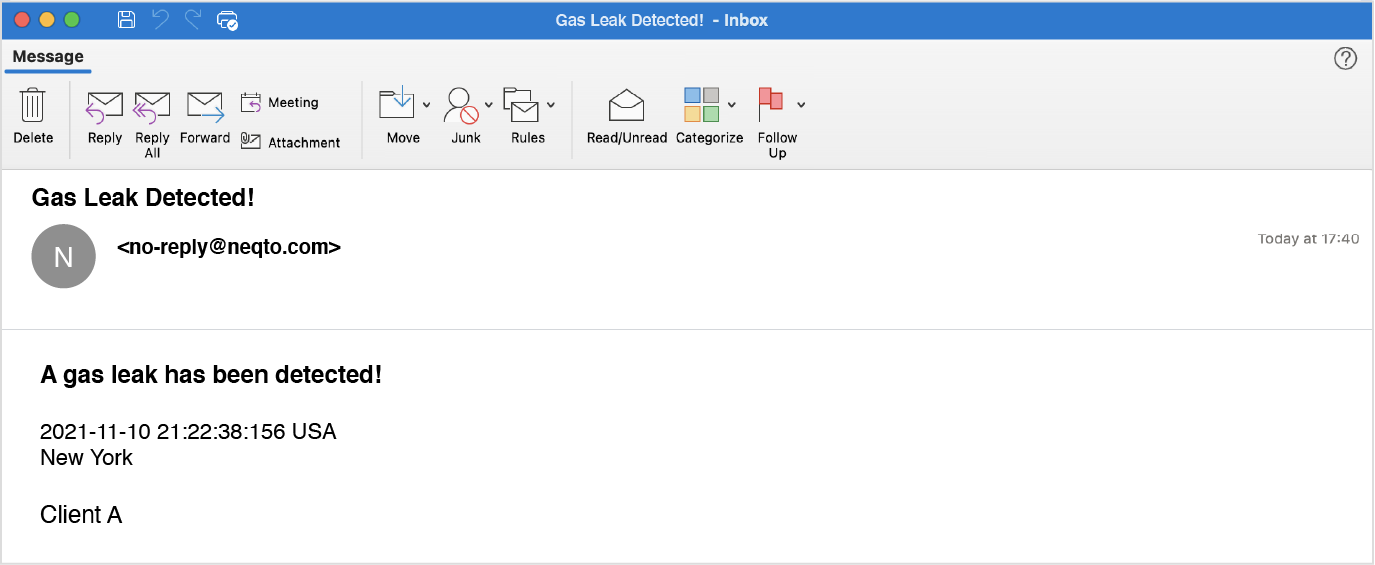
Figure 8: Email Alert Warning of Gas Leak
Now, suppose you want to add a function to control the gas using a solenoid valve. We can do this while the system continues operation by connecting a solenoid valve to an IO of Device A. For this example, we'll use a relay instead of a solenoid valve.
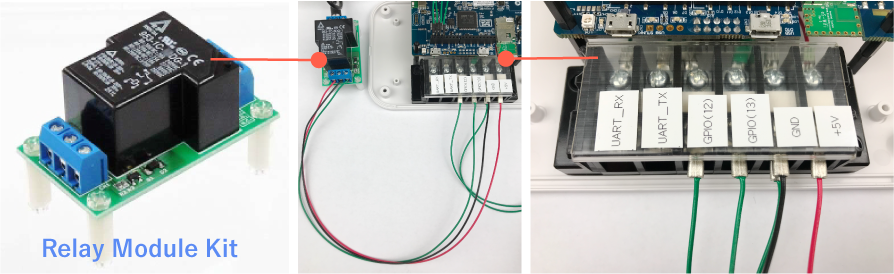
Figure 9: Connection between the relay module kit and device A
The control line and power supply of the relay module kit are connected to GPIO (13), +5V, and GND of Device A. Once the connection to Device A is complete, there are just two steps left to complete the upgrade!
Step 1
On NEQTO Console's JavaScript editor, add the initial settings for GPIO13 as well as the configurations to set GPIO13 to 1 (High) when a gas leak is detected.
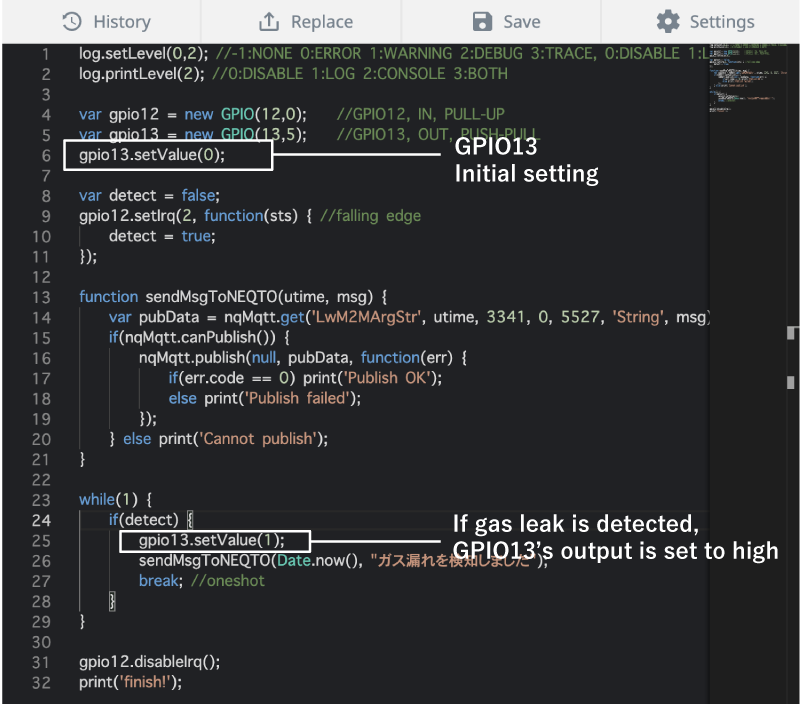
Figure 10: GPIO13 Initial settings & configuration
Step 2
Finally, click the "Reload Script" command on NEQTO Console. That's all there is to adding new functionality! We connected a light to the relay module kit to easily visualize the result. The light is switched on when a gas leak is detected.
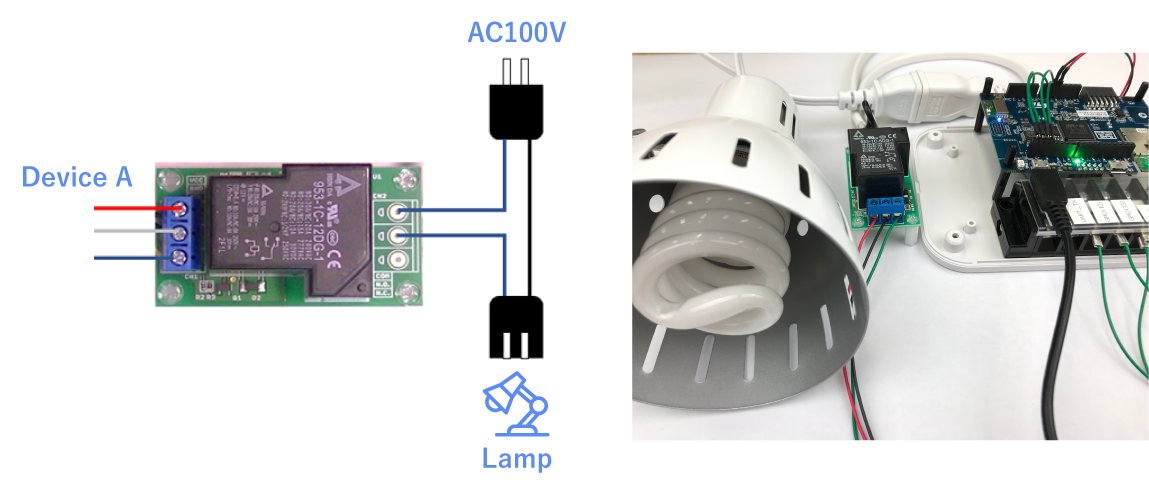
Figure 11: Connection between the light & the relay kit module
We confirm again with a test gas that, when it is detected by the LP gas detector, the relay module kit's relay closes and the light switches on.
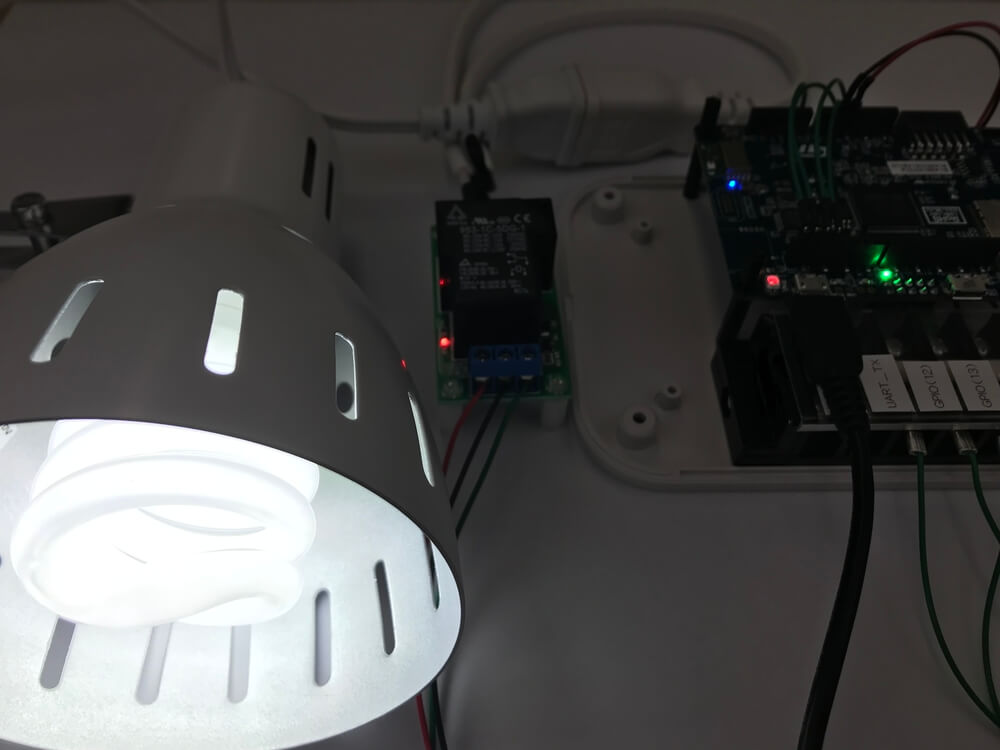
Figure 12: Light Successfully Turned On
As you can see, adding functionality with JavaScript is quite simple!
5. Summary
In this blog, we demonstrated how adding new functions can be made simple using NEQTO and JavaScript. By adding modifiable components to your system's interface, such as the terminal block connection in our example, it becomes possible to add functions even to running systems with JavaScript.
We added functionality over GPIO this time, but NEQTO also supports other protocols, such as UART, which can be used to connect to an even greater variety of devices. While there are a large variety of communication standards for UART, with JavaScript it's possible to flexibly support those standards even in running systems.
In addition, at any time should you find it necessary to update the firmware on connected non-NEQTO microcontrollers in order to add functions, NEQTO includes a feature called Machine Driver. Machine Driver is a unique feature to remotely update the firmware of connected microcontrollers. We'll explain more about Machine Driver in a future blog, so be sure to keep an eye out for it.
Reference Site
https://neqto.jig-saw.com/en/product/machine-driver
Links
NEQTO Hardware Spresense and the STM32 Discovery Kit (B-L4S5I-IOT01A) both support NEQTO Engine and can be ordered online, so get yours to try NEQTO today!
Links to devices used in this blog (Japanese only)
STM32L4+ Discovery kit IoT node [B-L4S5I-IOT01A] :STMicroelectronics LP gas detector [APH-32SV]:Ricoh High-current large relay module kit [CXD5602PWBLM1J]:Akizuki Denshi Tsusho